hi :)

hi :)
Author: Hunter Wilcox
I recently bought an Adafruit 64x64 LED matrix and I thought I should make a setup guide for the Raspberry Pi, since there
wasn't a whole lot out there about 64x64 LED matrixes.
We need to install the adafruit bonnet driver installer to access the hat
curl https://raw.githubusercontent.com/adafruit/Raspberry-Pi-Installer-Scripts/master/rgb-matrix.sh >rgb-matrix.sh
sudo chmod +x rgb-matrix.sh
sudo ./rgb-matrix.sh

You should then see a screen like the one above.
- Press Y
- Select hat (1 for me)
- Next, if you want the absolute best quality, select 1, but it does require soldering and disabling sound (I'd select 2 for testing)
- Confirm and press Y
Now this may take some time to compile.
After that finishes reboot your Pi.
Now that we are done installing the driver, it's time to create a project.
Make a project folder with this
mkdir LED-Matrix-Projects; cd LED-Matrix-Projects
mkdir Test-Project; cd Test-Project
Next we need to install git and get the required library. We'll be using rpi-rgb-led-matrix.
sudo apt install git
git init
git submodule add https://github.com/hzeller/rpi-rgb-led-matrix.git matrix
Now we have to compile the libary.
cd matrix; make
Move back one folder and create a C++ file called main.cc and edit it
cd..
touch main.cc
nano main.cc
Insert the following code
#include "led-matrix.h"

#include <unistd.h>
#include <math.h>
#include <stdio.h>
#include <signal.h>

using rgb_matrix::RGBMatrix;
using rgb_matrix::Canvas;

volatile bool interrupt_received = false;
static void InterruptHandler(int signo) {
  interrupt_received = true;
}

static void DrawOnCanvas(Canvas *canvas) {
  /*
   * Let's create a simple animation. We use the canvas to draw
   * pixels. We wait between each step to have a slower animation.
   */
  canvas->Fill(0, 0, 255);

  int center_x = canvas->width() / 2;
  int center_y = canvas->height() / 2;
  float radius_max = canvas->width() / 2;
  float angle_step = 1.0 / 360;
  for (float a = 0, r = 0; r < radius_max; a += angle_step, r += angle_step) {
    if (interrupt_received)
      return;
    float dot_x = cos(a * 2 * M_PI) * r;
    float dot_y = sin(a * 2 * M_PI) * r;
    canvas->SetPixel(center_x + dot_x, center_y + dot_y,
                     255, 0, 0);
    usleep(1 * 1000);  // wait a little to slow down things.
  }
}

int main(int argc, char *argv[]) {
  RGBMatrix::Options defaults;
  defaults.hardware_mapping = "regular";  // or e.g. "adafruit-hat"
  defaults.rows = 32;
  defaults.chain_length = 1;
  defaults.parallel = 1;
  defaults.show_refresh_rate = true;
  Canvas *canvas = RGBMatrix::CreateFromFlags(&argc, &argv, &defaults);
  if (canvas == NULL)
    return 1;

  // It is always good to set up a signal handler to cleanly exit when we
  // receive a CTRL-C for instance. The DrawOnCanvas() routine is looking
  // for that.
  signal(SIGTERM, InterruptHandler);
  signal(SIGINT, InterruptHandler);

  DrawOnCanvas(canvas);    // Using the canvas.

  // Animation finished. Shut down the RGB matrix.
  canvas->Clear();
  delete canvas;

  return 0;
}
Finally, compile and run
g++ -Imatrix/include -Wall -O3 -Wextra -Wno-unused-parameter -c -o main.o main.cc
g++ main.o -o main -Lmatrix/lib -lrgbmatrix -lrt -lm -lpthread
sudo ./main --led-gpio-mapping=adafruit-hat --led-rows=64 --led-cols=64
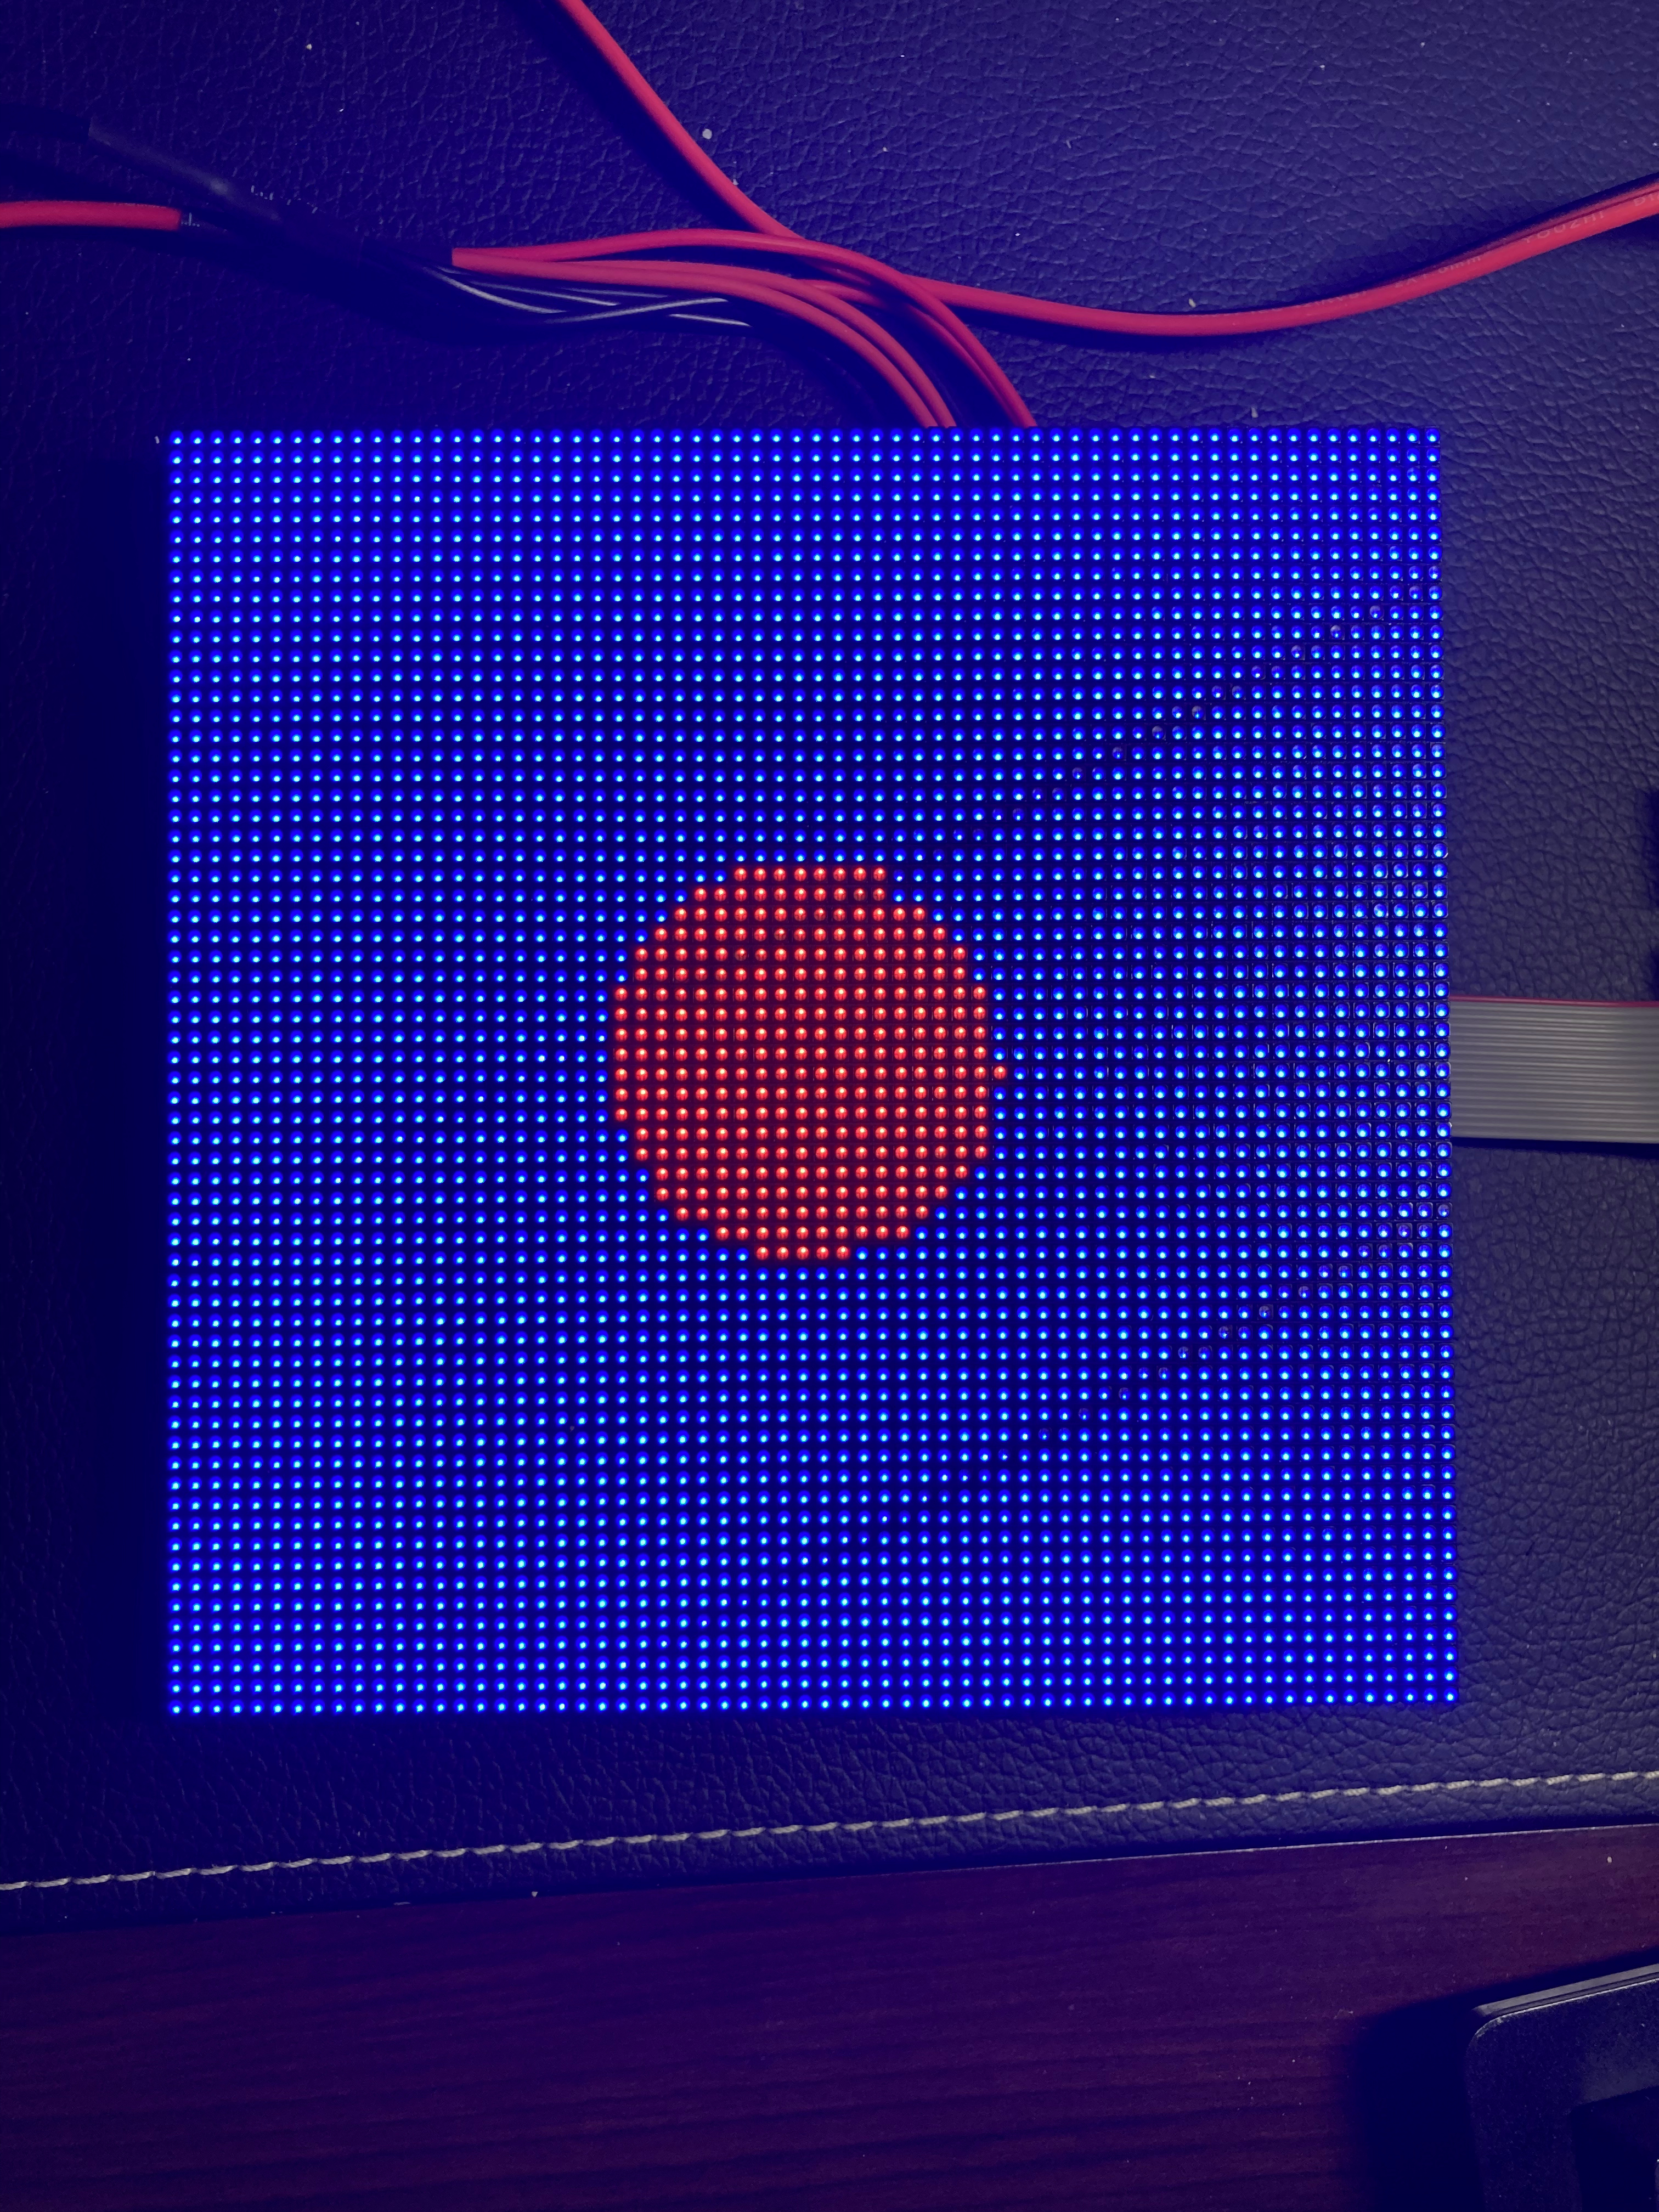
You should see the following
For more library information https://github.com/hzeller/rpi-rgb-led-matrix